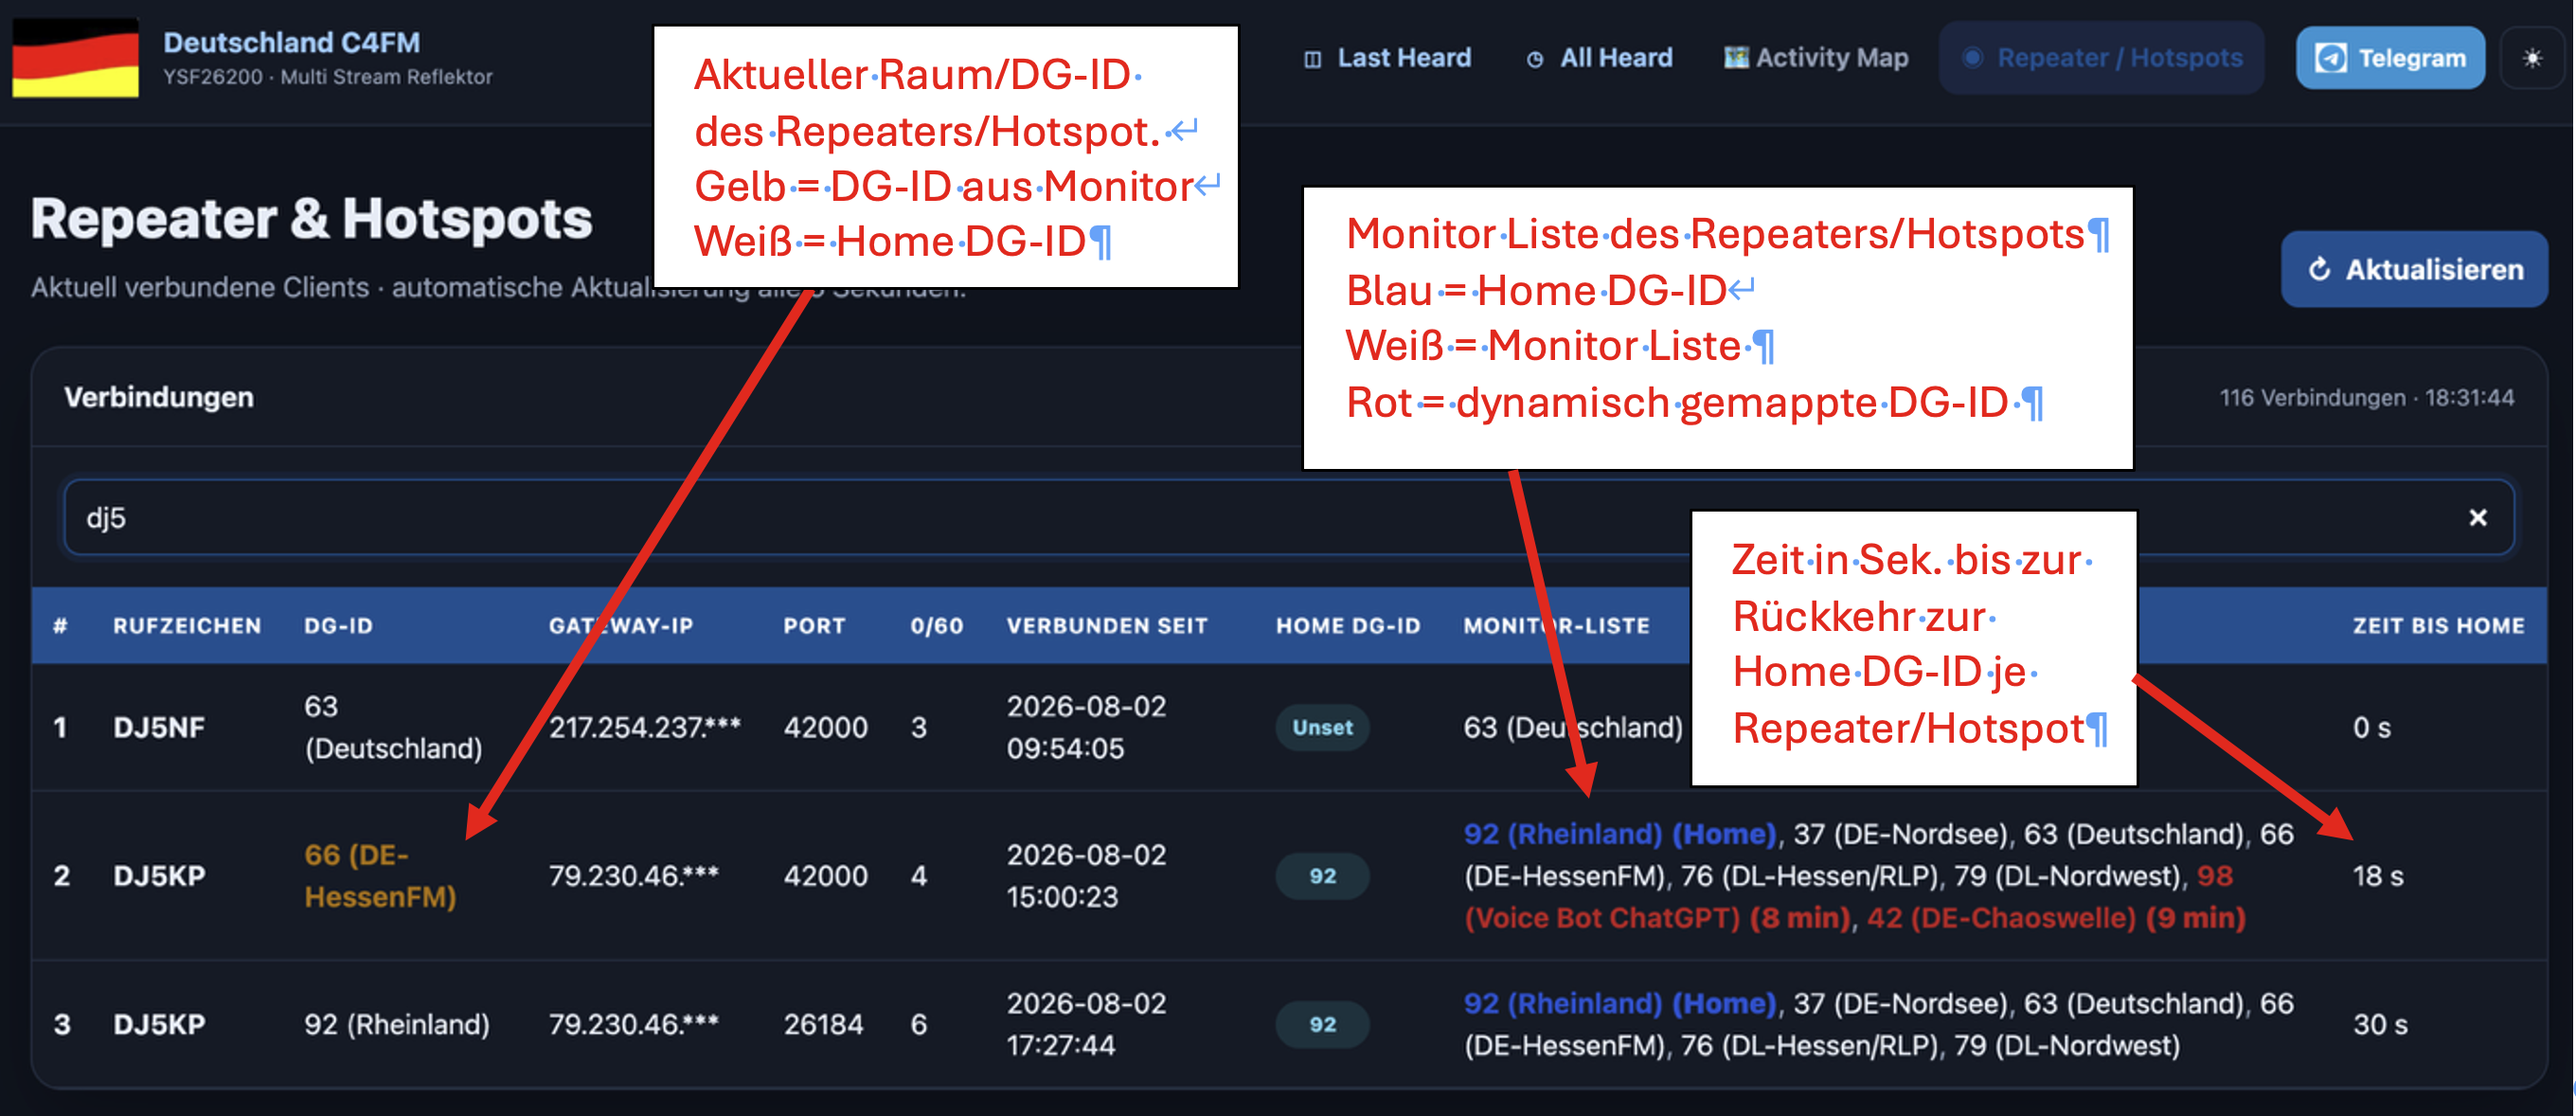
Home DG-ID, monitor lists, dynamic DG-IDs and automatic return.
1. General information
The pYSFReflector is a powerful YSF reflector
for the Yaesu System Fusion network. It allows a reflector to be
operated with advanced features that go beyond the standard
feature set.
Key additions include:
Support for Home DG-IDs
Simultaneous monitoring of multiple DG-IDs
Dynamic assignment of additional DG-IDs
Automatic return to the Home DG-ID
Convenient management through the dashboard
Display of the current monitor lists of all connected clients
This lets a repeater or hotspot monitor several talk groups at
once, without the user having to constantly switch between
DG-IDs manually.
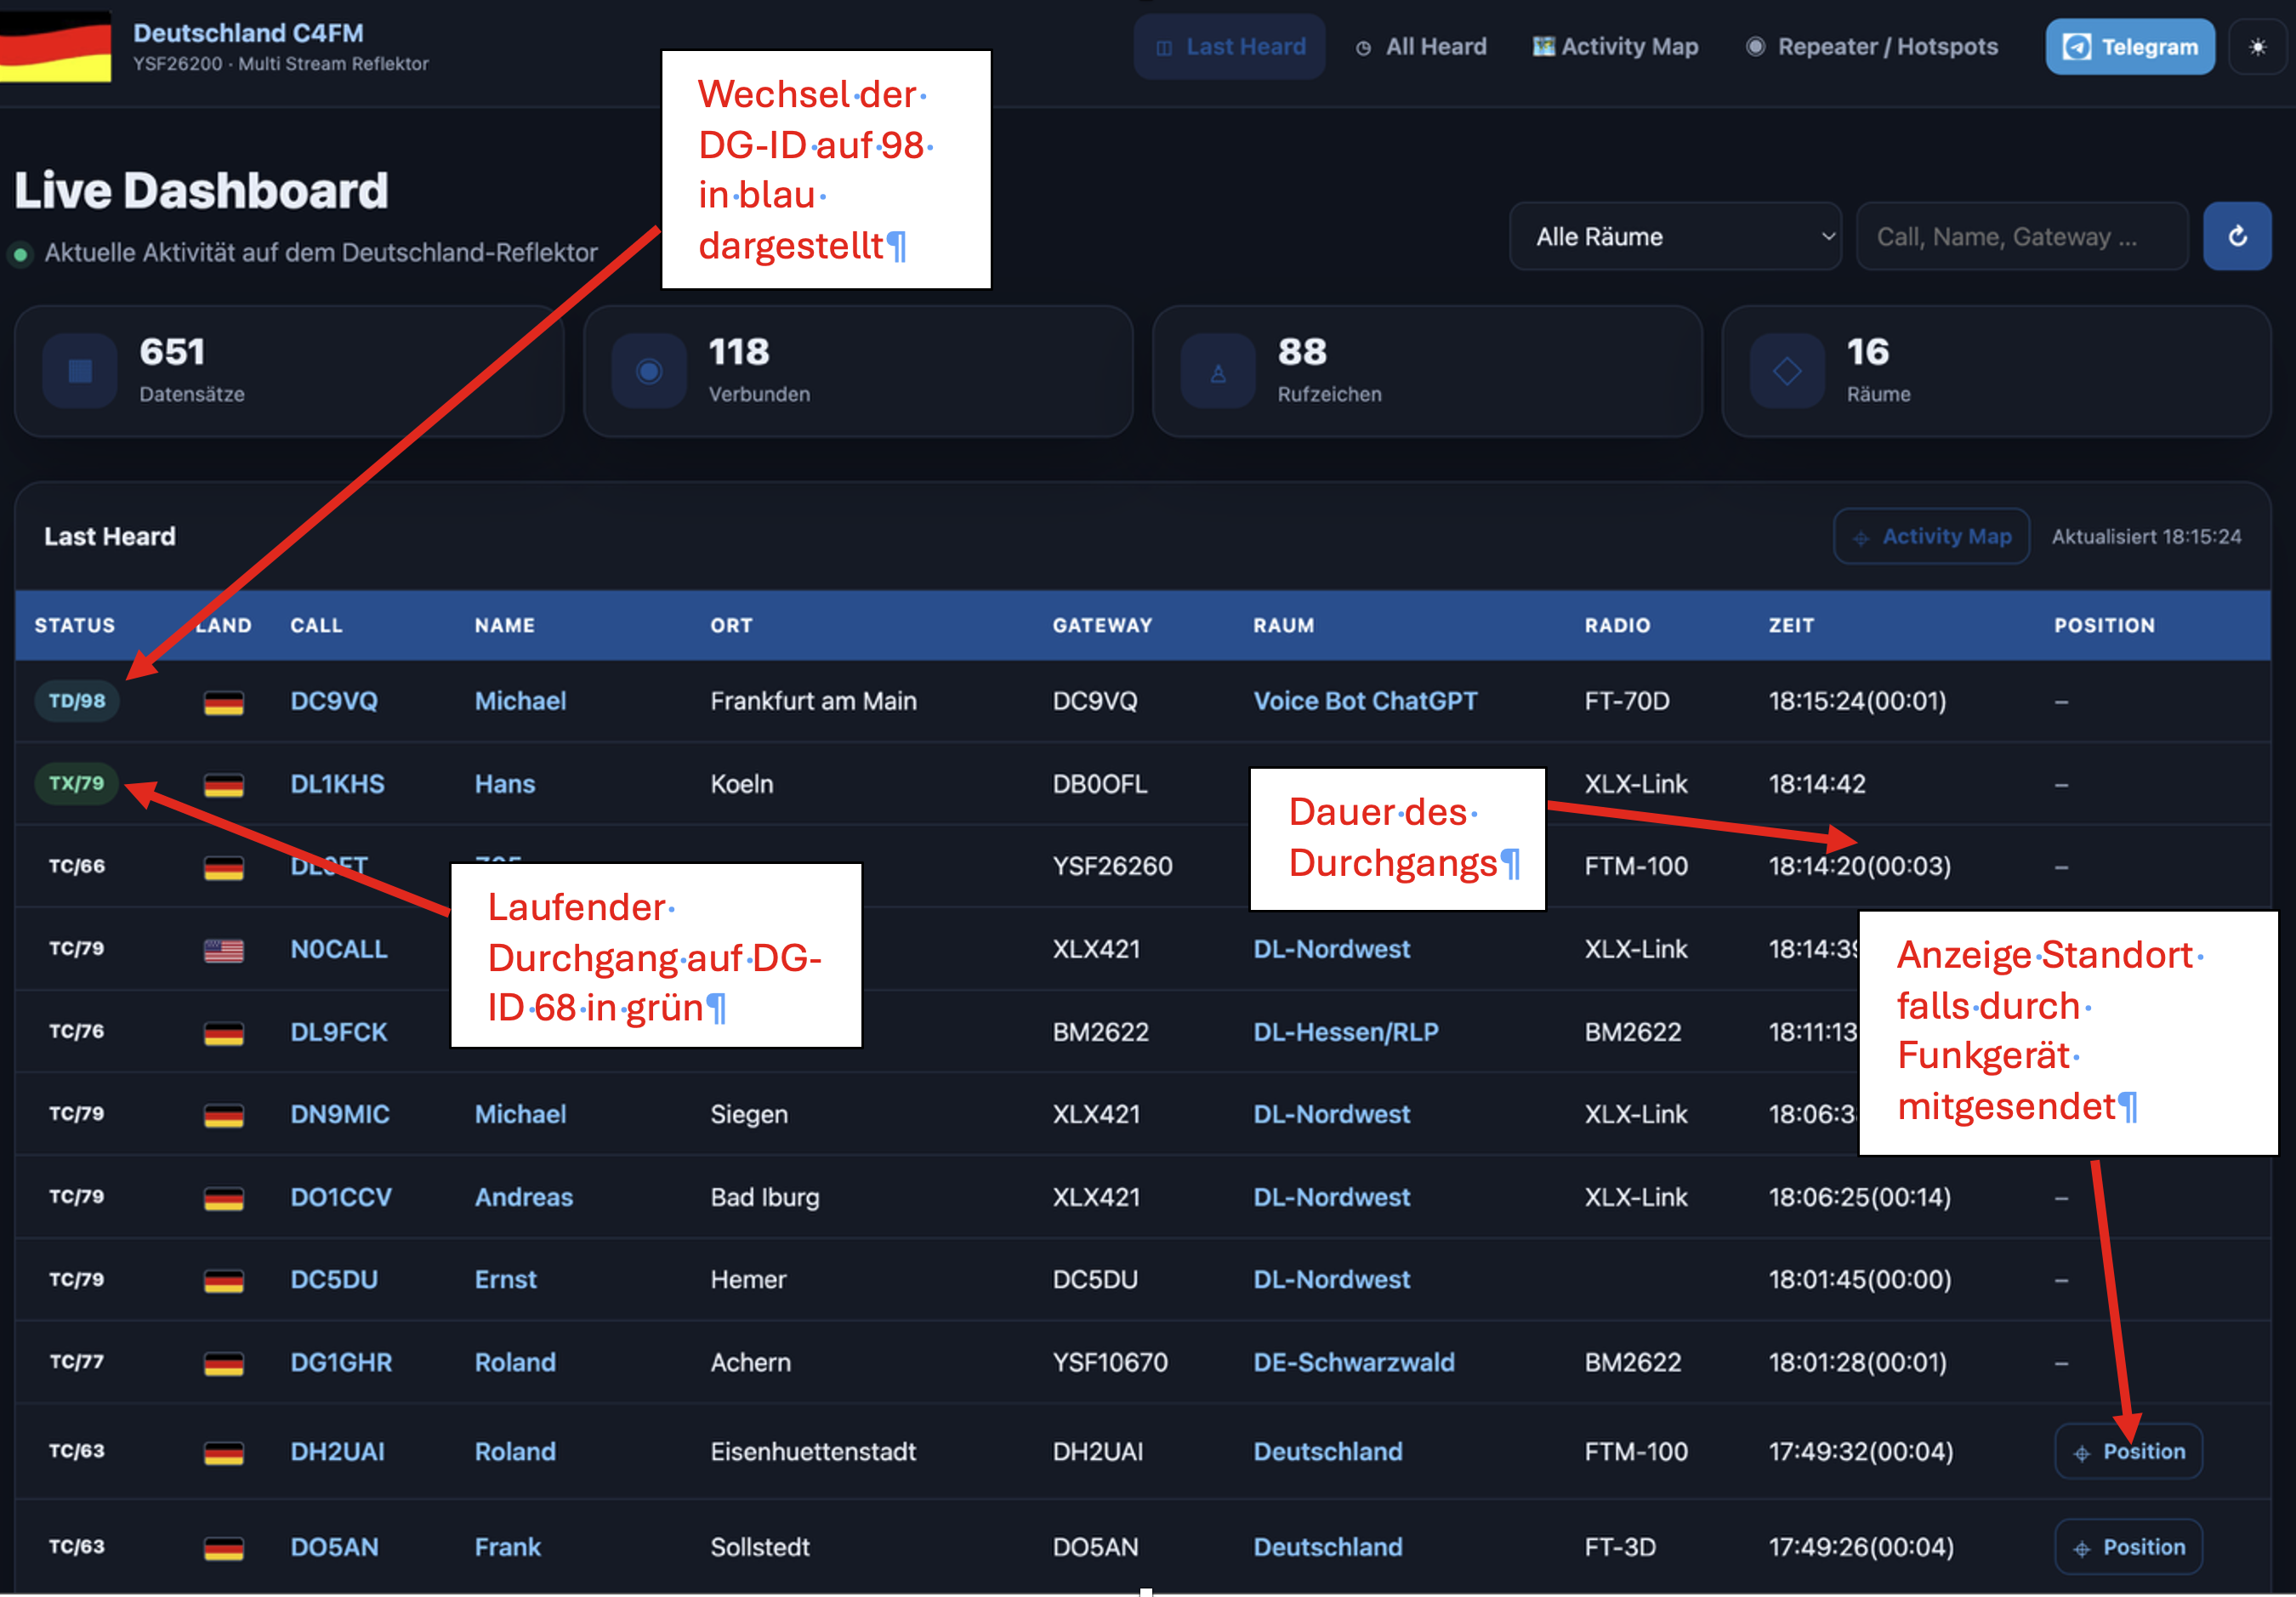
If your GPS position or radio model is not shown on the dashboard, it's because you are connecting via a non-YSF reflector.
This can happen, for example, when connecting through Wires-X, which loses all YSF metadata via the Brandmeister bridge (gateway "BM2622"), or through a multimode setup based on XLX (gateway "XLXxxx"). In both cases this data is lost and can only be recovered by connecting your hotspot/repeater directly to DE-Deutschland (YSF26200).
2. Home DG-ID and monitor list
Every client has exactly one Home DG-ID.
The Home DG-ID is the client's preferred talk group. After a
certain period of inactivity, the client automatically returns
to this DG-ID.
Example
Setting
Value
Home DG-ID
76
Monitor list
66,79,80
The client normally operates on DG-ID 76.
In addition, it continuously monitors:
DG-ID 66
DG-ID 79
DG-ID 80
As soon as a transmission starts on one of these DG-IDs, the
reflector automatically switches the client to that DG-ID.
This means no conversations on the monitored DG-IDs are missed.
3. Creating a monitor list
The monitor list can be set either
via the YSF Options String (YSFO)
or via the reflector configuration
The first entry always defines the Home DG-ID.
All further entries form the monitor list.
WPSD hotspot
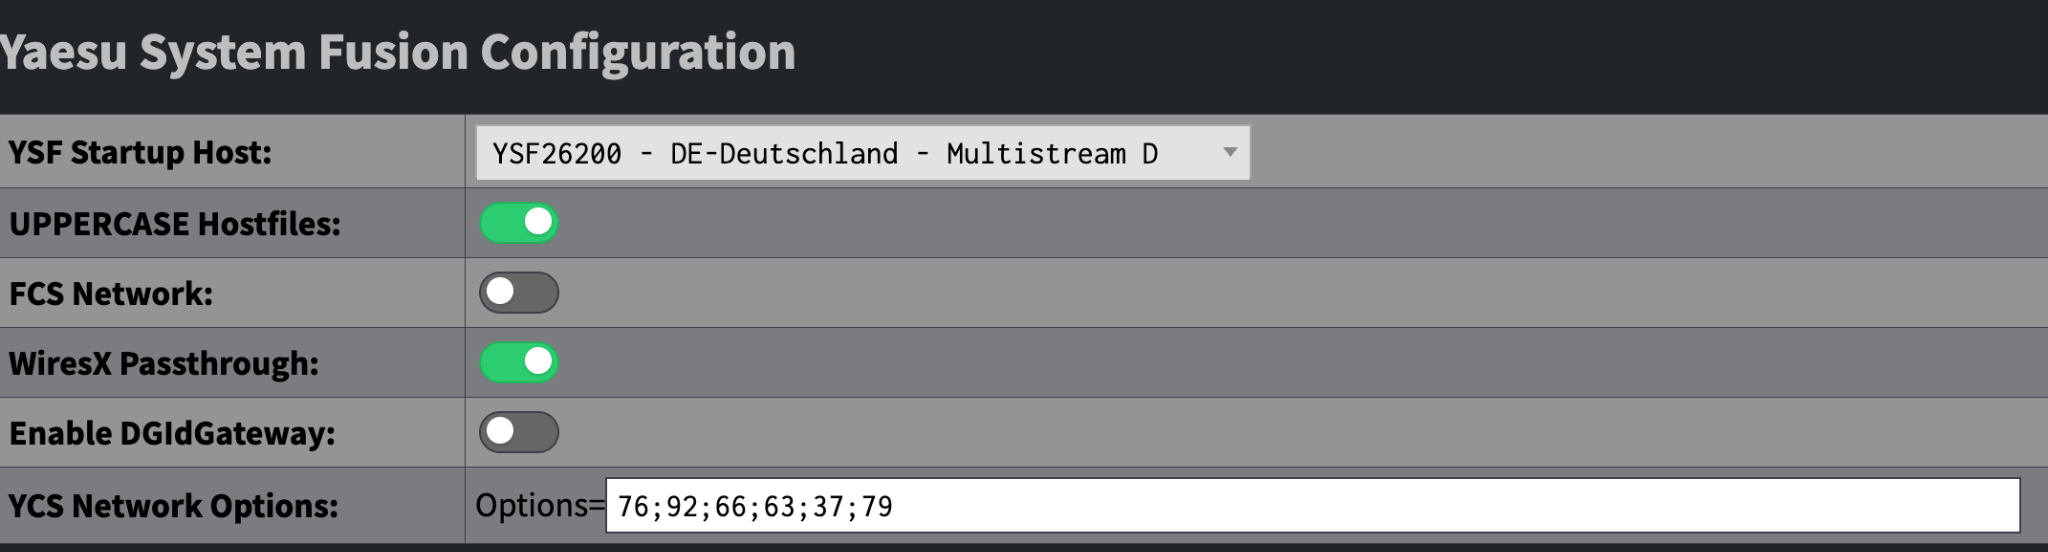
On WPSD, the monitor list is entered in the
YCS Network Options field.
The first value is always the Home DG-ID,
all further values form the monitor list.
Example: 76;92;66;63;37;79
Home DG-ID: 76
Monitor list: 92, 66, 63, 37, 79
Configuring the Home DG-ID and monitor list in WPSD.
openSPOT
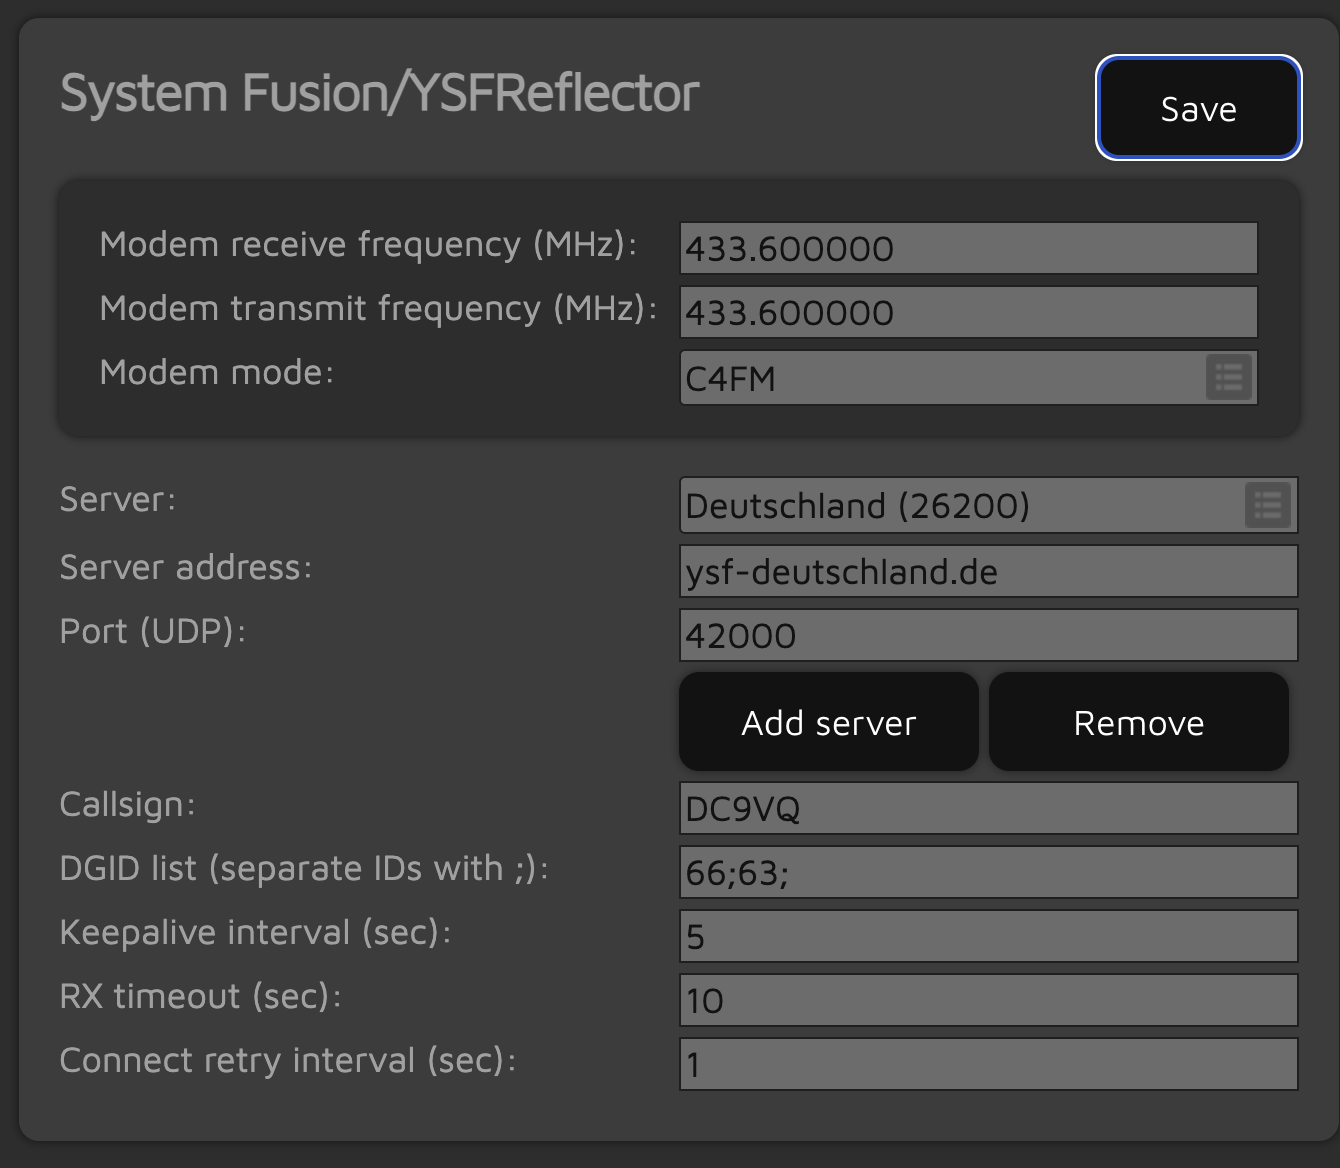
On the openSPOT, the monitor list is entered in the
DGID list (separate IDs with ;) field.
Unlike WPSD, this field contains only the monitor DG-IDs.
The Home DG-ID is determined by the radio's currently configured transmit DG-ID.
Example:
DGID list:
66;63;
The client additionally monitors DG-IDs 66 and 63.
Configuring the monitor list in openSPOT.
BlueDV
BlueDV also lets you set the YSF options string. Simply add the following line under the FUSION section of your BlueDV config (in Documents/Bluedv):
            [FUSION]
            ..........
            Options="76;79;92;63"
Pi-Star
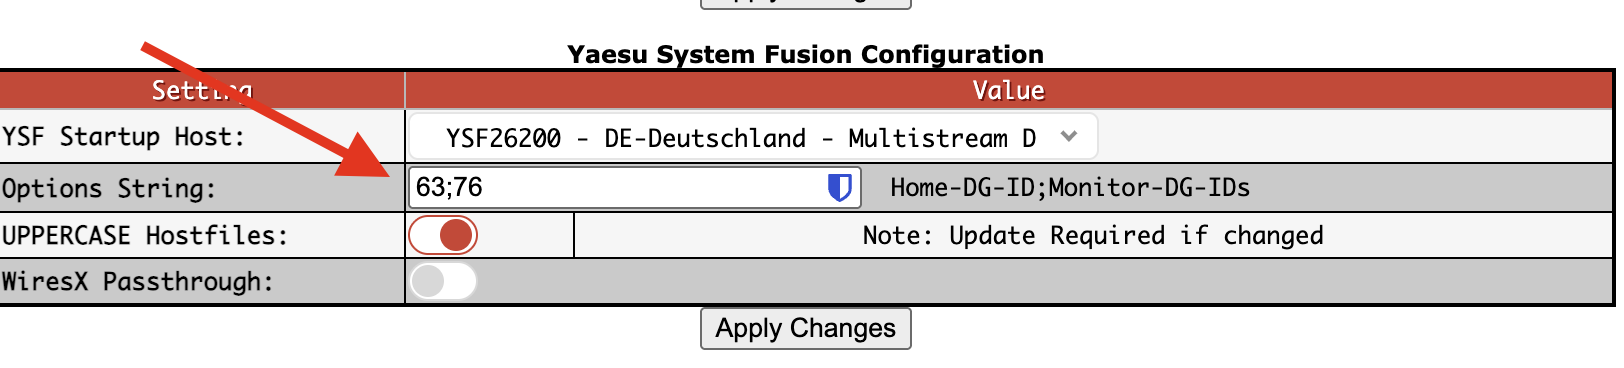
On Pi-Star, the Home DG-ID together with the
monitor list is entered in expert mode in the file
YSFGateway.ini.
There are two ways to configure the connection string on Pi-Star: through a manual ini entry, or by applying a patch.
Applying the patch on Pi-Star
Go to the Pi-Star dashboard, then Configuration, then Expert. On the far right you'll find "SSH Access". Click it and then enter the following commands one after another.
Enables reverting to the configured startup reflector.
Debug=0
Disables extra debug output.
Startup=DE-Deutschland
Connects Pi-Star to the DE-Deutschland reflector after startup.
Reconnect=1
Enables automatic reconnection.
Options="76;79;92;63"
Defines the Home DG-ID and the monitor list.
Interpreting the options string:
Home DG-ID: 76
Monitor list: 79, 92, 63
The first entry in the Options field is always the
Home DG-ID. All further entries form the
monitor list.
After connecting, the hotspot initially operates on Home DG-ID 76.
The reflector additionally monitors DG-IDs 79, 92 and 63. If a
QSO starts on one of these DG-IDs, the client is automatically
switched to that talk group.
An unconfigured DG-ID is dynamically added to the monitor list
for 15 minutes when the client transmits on it. Sending on
DG-ID 90 immediately clears all dynamic DG-ID
assignments and returns the client to its Home DG-ID.
Example
76,66,79,80
Home DG-ID 76
Monitor list 66, 79, 80
4. Switching to another DG-ID
There are two different options.
4.1 Switching to a DG-ID on the monitor list
If activity starts on a DG-ID that is already on the monitor
list, the reflector automatically switches to that DG-ID.
Example:
Home DG-ID: 76
Monitor list: 66, 79, 80
A user starts a conversation on DG-ID 79.
The reflector detects the activity and automatically switches
the client to DG-ID 79.
After the conversation ends, the client initially stays on
DG-ID 79. Only once the back-to-home timer expires does it
automatically return to the Home DG-ID.
4.2 Switching to a DG-ID outside the monitor list
If a DG-ID is used that is not on the monitor list, the
reflector treats it as a temporary dynamic DG-ID.